
Christmas Crafts For Kids
Fun And Easy Christmas Crafts Ideas For Kids
The best thing about Christmas crafts for kids is that they help kids get into the spirit of things while fueling their creativity too. As we all know, Christmas is the most awaited festive season for the kids. They love spending time with family and friends. In addition to this, conduct Christmas arts and crafts for kids in order to expand their creativity. There are easy Christmas crafts for kids where they can create something innovative with attractive materials.
To make it entertaining, you can come up with Christmas craft ideas for kids. Apart from winter crafts for kids, they also explore their imaginative skills to make decorative items for Christmas trees and other related things. There are also printable Christmas crafts for kids available online. Here are a few Christmas crafts for kids your children will love. Moreover, you can make them practice Christmas paper crafts for kids.
Interesting DIY Christmas Crafts For Kids
Kids are extremely energetic and lively when you offer them to make some diy Christmas crafts. They would collect materials from in and around the house. For example, tissue papers, cardboards, color papers, ornaments, tooth picks, sticks, leaves, stones, etc. Conducting art activities for kids will enhance their thinking skills as well as come up with creative crafts. It will not only provide fun and entertainment to the children but also enhance their learning skills. Try these easy Christmas crafts for kids and let us know what you think.
List Of Simple Christmas Crafts For Kids
- Paper Plate Christmas Tree – One of the Easy Christmas crafts for kids: Here, you can make decorative items with the help of paper plates. Materials you will need are as follows:
- Paper plates
- Colorful pom poms
- Glue
- Green paint
- Tape
- Pom Pom Ornaments – DIY Christmas crafts for kids: Here’s another awesome example of easy Christmas crafts for kids. Materials you will need for Santa Belt Ornament are as follows:
- Pom pom
- Gold point pen
- Glass ornament
- Black tape
- Reindeer Ornament – Fun Christmas Crafts For Kids: Check out interesting diy ornaments for Christmas decoration. Materials required are as follows:
- Pom pom
- Reindeer sticker
- Glass ornament
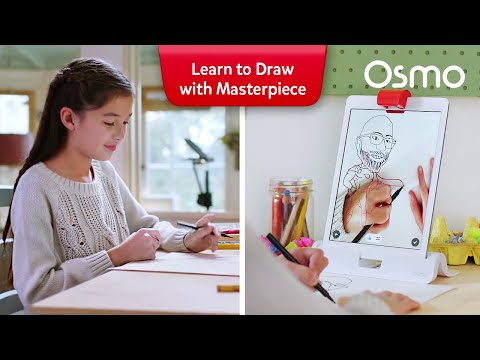
- Osmo’s Masterpiece: It is an interactive drawing game, to draw a reindeer with ease. This reindeer could then serve as a sticker for your ornament. Check out Masterpiece now.
- See-Through Snowman Ornament – Homemade Christmas Crafts For Kids: Making ornaments is the best activity where kids invest their time during Christmas holidays. Materials required are as follows:
- Pom poms
- Glass ornament
- Paint and brush
- Paint pens
- Toilet Roll Reindeer – Colorful Christmas Crafts For Kids: Looking for more ideas for Christmas arts and crafts for kids? We’ve got you covered. You’ll need the following materials for the craft as mentioned below:
- Toilet paper rolls
- Sandpaper / Brown paint
- Googly eyes
- Red artificial berries / Pom poms / Buttons
- Ribbon
- Brown pipe cleaners
- Glue
- Tissue Paper Wreath – Christmas Wreath Craft For Kids: Materials required for one of the best DIY Christmas crafts for kids are as follows:
- Tissue paper
- Paper plate
- Green paint
- Pom poms and sequins
- Ribbon
- Glue
- Pencil
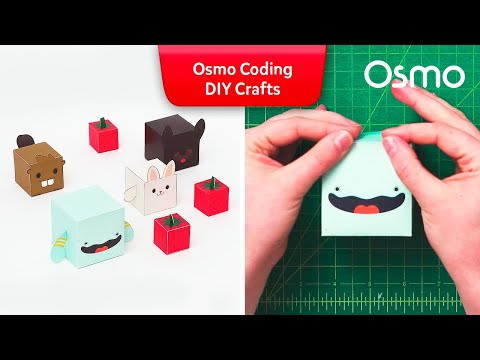
- Osmo Coding DIY Crafts and Printables: Here, you can make your own DIY crafts for decorating your Christmas Tree or any other things. You can make printable Christmas crafts for kids. Check this out now!
- Christmas Gnome: Here’s another great example of Christmas crafts for kids to make at home. Materials you will need are as follows:
- Foam cone
- Mason jar
- Glue
- 4 colors of craft felt paper: red, white, blue, and tan
- Black marker
- Black ribbon
- DIY Christmas Chandelier: Here, you can make an attractive chandelier for the Christmas tree. Materials required are as follows:
- Color papers
- Color pencils/watercolors
- Glue
- Threads
- Match stick Christmas Tree: This activity is very interesting for children to make tiny Christmas trees for the decoration of the house. Materials required are as follows:
- Match Sticks
- Glue
- Green color threads
Instructions: Find the center of your paper plate and cut out a quarter of the plate. Then, roll it up in the form of a cone and seal it with tape from the inside. Once your entire plate looks like a cone, paint it green to make it look like a Christmas tree. Finally, when the paint dries out, decorate it with colorful pom poms using glue. This is one of the best DIY Christmas crafts for kids.
Instructions: Take a red pom pom and put it inside your glass/plastic ornament. Wrap the ornament with black tape to make it look like Santa’s wearing a belt! Add the finishing touches by using your gold point pen to draw Santa’s belt. For more Christmas craft ideas for kids, continue to read.
Instructions: Put your pom pom inside the ornament, and stick your reindeer sticker right on the center of the ornament. It’s so simple, isn’t it? And it’s one of the best examples of Christmas arts and crafts for kids.
Instructions: Take your pom poms and place them inside your ornament. Paint a majority of the ornament, but leave some space to draw an outline of a snowman. Use your paint pens to draw your snowman any which way you please. Read the rest of our article for more Christmas crafts for kids.
Instructions: Paint your toilet paper rolls brown, or cover your toilet paper with sandpaper. Then, make holes so you could place your brown pipe cleaners through these holes. (to make it look like the reindeer’s antlers!) Next, attach a red berry or pom pom or button on your toilet paper roll for the reindeer’s nose. Next, add your googly eyes, and hang your toilet roll reindeers with a ribbon.
Instructions: Cut out the shape of a circular wreath using a white paper plate. Next, paint several tissue squares green, and stick those tissue squares all over your circular wreath with glue. Take your pencil (use the eraser end) to shape each tissue square. Decorate your wreath with pom poms, sequins, and glitter (this step is optional) and hang it with a ribbon.
Instructions: Take your foam cone and wrap it around with your red felt using glue. Next, wrap your mason jar using blue felt. Glue the lid of your jar so that the cone can sit tight, right on top. Decorate your jar with a beard (using your white felt), and cut out the shape of a box using tan felt for the face of your gnome. You could use the same felt to cut out tiny boots for your gnome too! Make the eyes with your black marker, and your Christmas Gnome is complete. You could also add the finishing touches with a black ribbon right in the middle of the jar, to make a belt for your gnome.
Instructions: You can take paper and cut into different shapes such as circle, triangle, rectangle, square, oval, etc. Color the shapes using crayons and watercolors. Tie these shapes to the colorful threads. And finally tie them with colorful string of paper to the Christmas tree.
Instructions: Take around 10-15 match sticks. Start sticking them in the shape of a cone using glue. Now, cover the green color threads in such a way that match sticks are not visible.
Tips For Christmas Crafts For Kids To Make It Creative
Some of the tips for fun Christmas crafts for kids are mentioned below:
- Make it innovative.
- Keep things simple if possible.
- Try to use sustainable materials for crafts.
- Provide opportunities and materials to make Christmas paper crafts for kids.
- Provide Christmas crafts kits for kids such as stationery items, color pens, papers, ornaments, fabrics, etc.
For more creative drawing games for kids, check the rest of the articles such as thanksgiving crafts for kids, popsicle sticks crafts for kids and turkey crafts for kids.
Frequently Asked Questions on Christmas Crafts For Kids
What are some of the Christmas Crafts For Kids?
Some of the fun DIY Christmas Crafts For Kids are color paper Christmas tree, pom pom ornaments, reindeer decor items, Osmo’s masterpiece, tissue paper reindeer, Christmas wreath, etc.
What are the materials required for Osmo Coding DIY Crafts for Christmas Crafts For Kids?
The materials required for Osmo Coding DIY Crafts for Christmas Crafts For Kids are a paper, scissor, glue, scale and pencil.